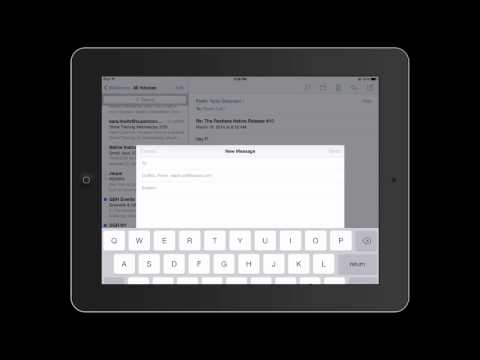
Hi, I'm Patrick Cole and I'm here today to talk about how to use the iPad's mail application. It may be new to the iPad, and if you're confused about the mail application, don't worry, it's pretty simple. Let me show you some of the things you can do with it. First, you'll want to set it up. Go to Settings > Mail, Contacts, and Calendars. If you don't have an account set up, hit the Add Account button and choose one of the options. If you have a different email provider, select Other and set it up using your settings. Once your account is set up, you can start using the mail application. To compose a new message, tap the pencil icon at the top right. Fill in the recipient's address, subject, and type your message. It's as easy as that. Now, let's explore the mail interface. When you open the mail application, you'll see your different accounts and the corresponding emails. For example, if you go to My iCloud, you'll find your emails there. If you scroll down to My Account, you'll see In, Sent, and Trash folders. You can also flag messages by tapping the flag icon. Additionally, you have the options to move a message to a different folder, delete it, reply, forward, or even print it using the same buttons. Even though the layout and icons might be slightly different, if you're familiar with other mail applications, you'll recognize these universal functions. That's pretty much it for using the mail application. Oh, one more thing! You can also set your mail to push new data automatically. Just go to Settings>Mail>Fetch New Data and enable the Push option. This way, you don't have to manually fetch emails; they will come in automatically. That's all there is to it! Now you can start...
Award-winning PDF software


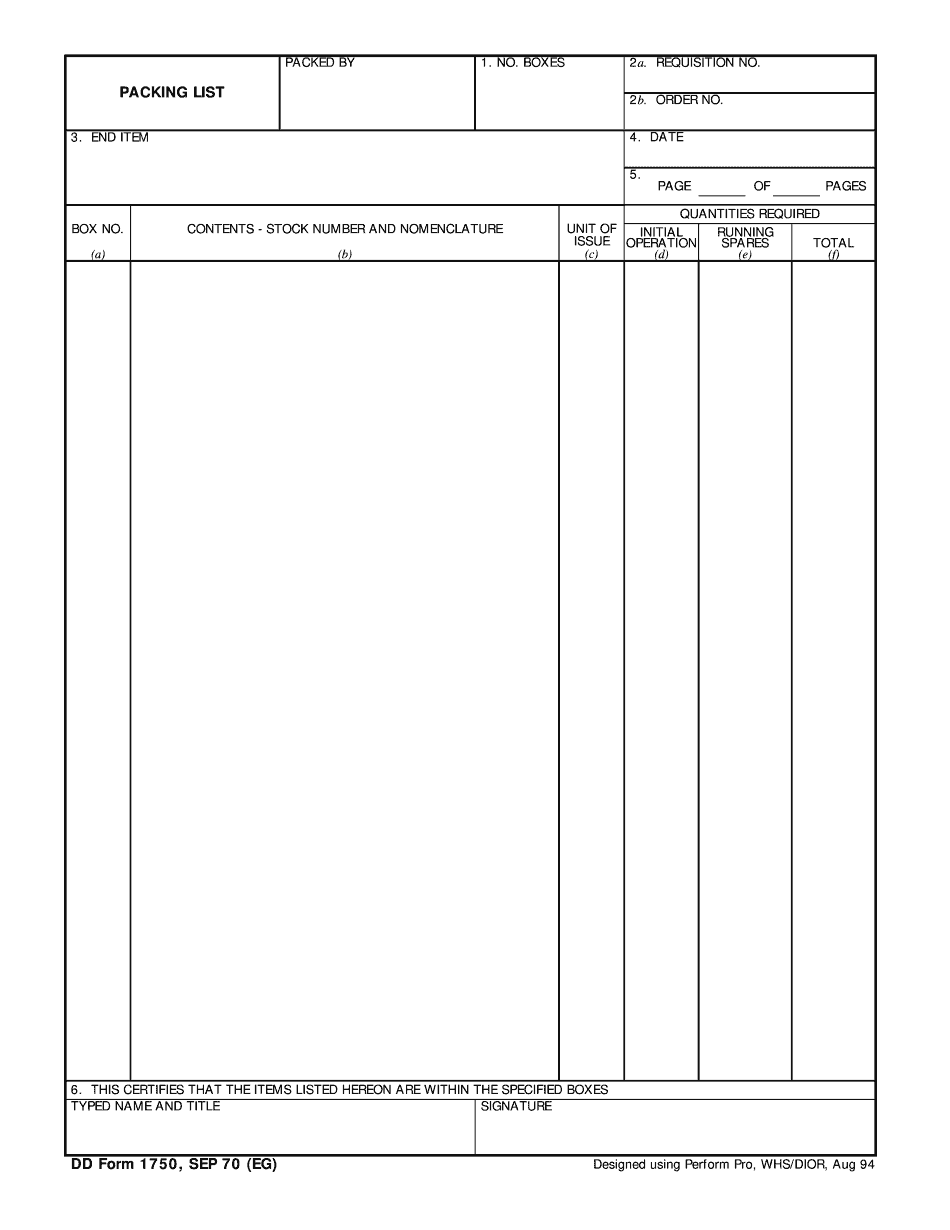
Video instructions and help with filling out and completing Dd 1750