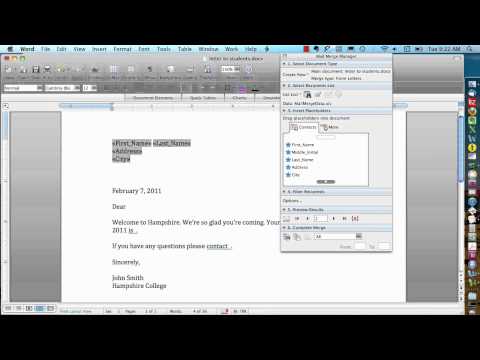
True." The next step in the mail merge is to open up Microsoft Word. In this example, we're going to be working on a form letter that we want to send out to students. So, here I have the text of the letter that I want to send to each student. I'm going to begin by going to the Tools menu and choosing Mail Merge Manager. This Mail Merge Manager panel pops up, and this is where we're going to create our mail merge. Here, in this top section, I'm going to choose "Create New" and then "Form Letters". Select "Recipients List". This is where we tell it what spreadsheet contains the data that we want to merge with. I'll say "Get List" and then "Open Data Source". As you can see, there are some other options here for where you can get your data from, such as FileMaker, Microsoft Office address book, or manually entering a new data source. But if you're using an existing spreadsheet, "Open Data Source" is what we want. Now, I can browse through and find my spreadsheet, wherever it is on my computer, and click "Open". You might get this little message, just click "OK". If your Excel file contains multiple spreadsheets or worksheets, it's going to ask you which one you want to use in the mail merge. In this case, we're going to use a worksheet called "Students". Once the file loads, we can look in this section here and see that it's loaded the fields from our spreadsheet. Each one of these fields represents one of the columns from our spreadsheet, and these field names match what we had for our column headers. So, let's say that the first thing we want to do is create an address block here with the person's name...
Award-winning PDF software


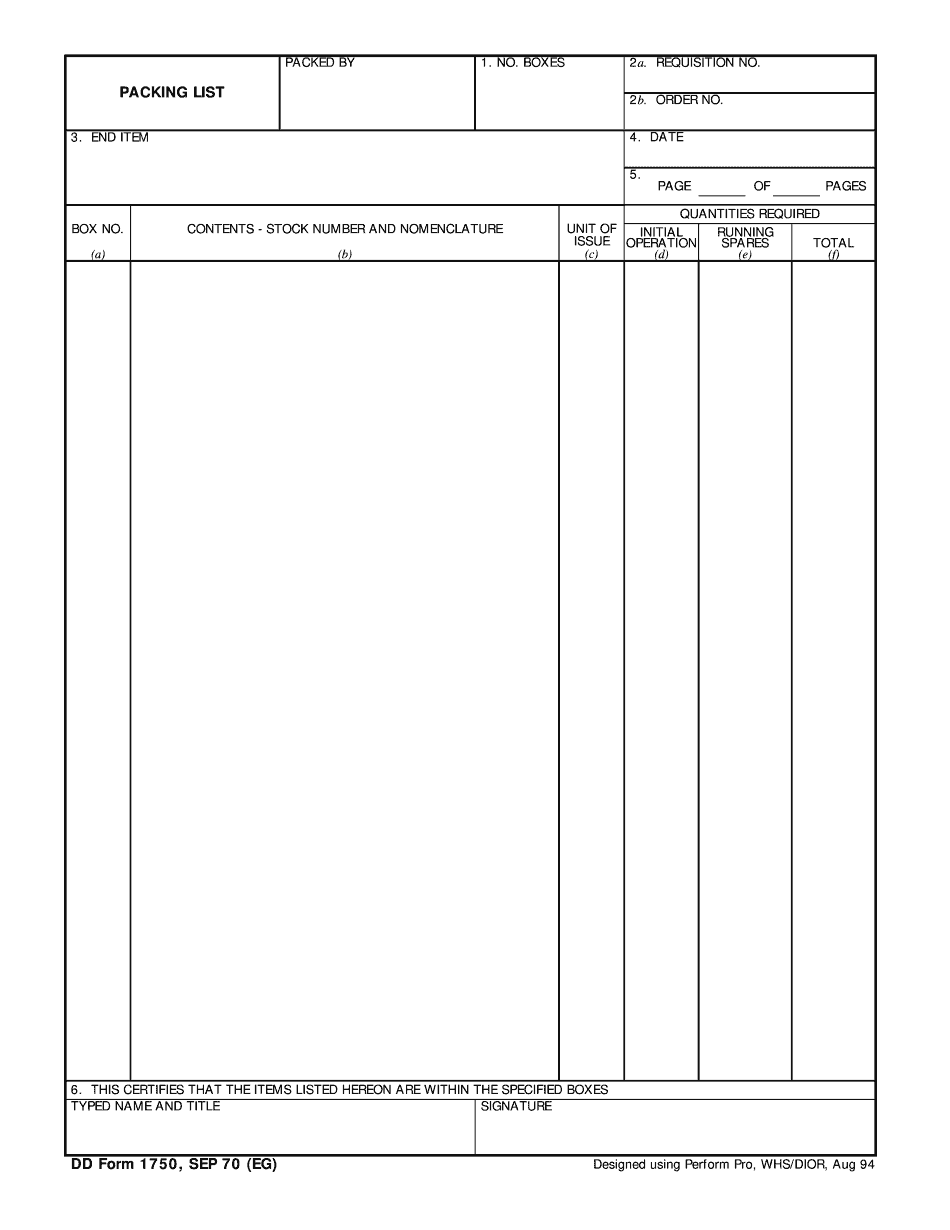
Video instructions and help with filling out and completing Dd 1750