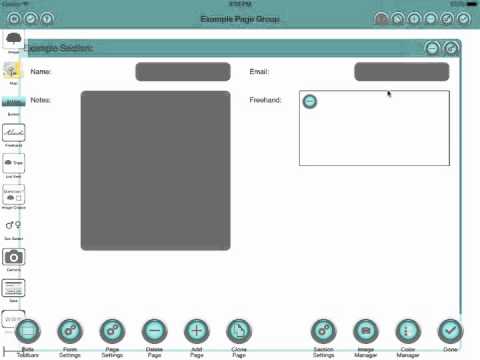
True" welcome to this quick demonstration of adding text fields to iPad for Maker I Cipolla. We're in design mode and we'll just drag in a couple of text fields. Each text field just has a label and a text area. We can go in the settings panel and change the label. We can also change the length of the caption in relation to the text area. I've made the caption long for no good reason, really. Here, I'll put in an email and make that long as well. I'll change the keyboard type to email and change the number of columns to 2 for this section. This is to make it look a little bit nicer with these fields. I'll drag in a notepad field, which is a long text field that allows text of any length. Now, let's drag in the final type of text input, which is a freehand text field. This is commonly used to capture a signature but can be used for any type of freehand text, like personal notes. With these fields, we can move them around using the up and down buttons on the settings panel or drag them around using a two-finger drag. Remember, this is a two-finger drag for moving controls around, not the one-finger drag used for adding new controls from the left-hand side. Adding a line break puts an extra space between the previous control and the next control. We can also clone controls by adding a line break, but in this case, I'll remove the extra line. The final thing we can do on the settings panel is to delete controls. Let's delete that one and confirm. We'll also delete the other notes. And that's all there is to it. We save that using the tick button, and...
Award-winning PDF software


Video instructions and help with filling out and completing Dd 1750